Think making homemade ice cream is complicated or requires fancy machines? Think again! With this No-Churn Cookies and Cream Ice Cream recipe, you can whip up rich, creamy, dreamy ice cream right at home — no ice cream maker needed. It’s the perfect blend of sweet vanilla goodness and crunchy cookie chunks. If you’ve ever craved ice cream that’s even better than store-bought, easier than you thought possible, and ready with just a few simple steps, you’re going to love this recipe!
Ingredients List
Here’s everything you’ll need to create your frozen masterpiece:
- 2 cups heavy whipping cream
- 1 (14-ounce) can sweetened condensed milk
- 1 teaspoon pure vanilla extract
- 15–20 chocolate sandwich cookies (like Oreos), crushed
Ingredient Tips:
- Use full-fat heavy cream for the richest, creamiest texture.
- Crush the cookies roughly — you want big and small pieces for better texture throughout the ice cream.
- Feel free to add a handful of mini chocolate chips for extra chocolaty bites!
These basic, pantry-friendly ingredients will give you incredible ice cream without any special equipment!
Timing
- Preparation Time: 15 minutes
- Freezing Time: 6 hours (or overnight)
- Total Time: About 6 hours 15 minutes
Compared to traditional ice cream recipes that can require overnight custard chilling and machine churning, this recipe saves you nearly 50% of the active prep time!
Step-by-Step Instructions
Step 1: Whip the Cream
In a large bowl, beat the heavy whipping cream with a hand mixer or stand mixer until stiff peaks form.
Pro Tip: Cold cream whips up faster — chill your mixing bowl too for best results!
Step 2: Mix the Base
In a separate bowl, combine the sweetened condensed milk and vanilla extract.
Gently fold the whipped cream into the condensed milk mixture until fully combined.
Step 3: Add Cookies
Fold in the crushed cookies gently, reserving a few pieces to sprinkle on top later.
Step 4: Freeze
Pour the mixture into a loaf pan or airtight container.
Sprinkle the remaining cookie pieces over the top.
Cover with plastic wrap or a lid and freeze for at least 6 hours, or until firm.
Step 5: Scoop and Serve
Scoop into bowls or cones and enjoy every rich, creamy bite!
Nutritional Information
For a 1/2-cup serving:
- Calories: 280
- Protein: 4g
- Fat: 18g
- Carbs: 28g
- Sugar: 22g
This homemade cookies and cream ice cream is slightly richer than store-bought but free from unnecessary preservatives and additives — a creamy indulgence you can feel good about!
Healthier Alternatives for the Recipe
Want to tweak the recipe for different dietary needs? Try these ideas:
- Use coconut whipped cream and sweetened condensed coconut milk for a dairy-free version.
- Reduce the cookies slightly or use low-sugar sandwich cookies to cut back on sugar.
- Swap half the condensed milk for Greek yogurt for a tangier, protein-boosted treat.
- Add finely chopped nuts like almonds for extra crunch and healthy fats.
These small adjustments can personalize the ice cream without losing its creamy magic!
Serving Suggestions
There are so many fun ways to enjoy this cookies and cream ice cream:
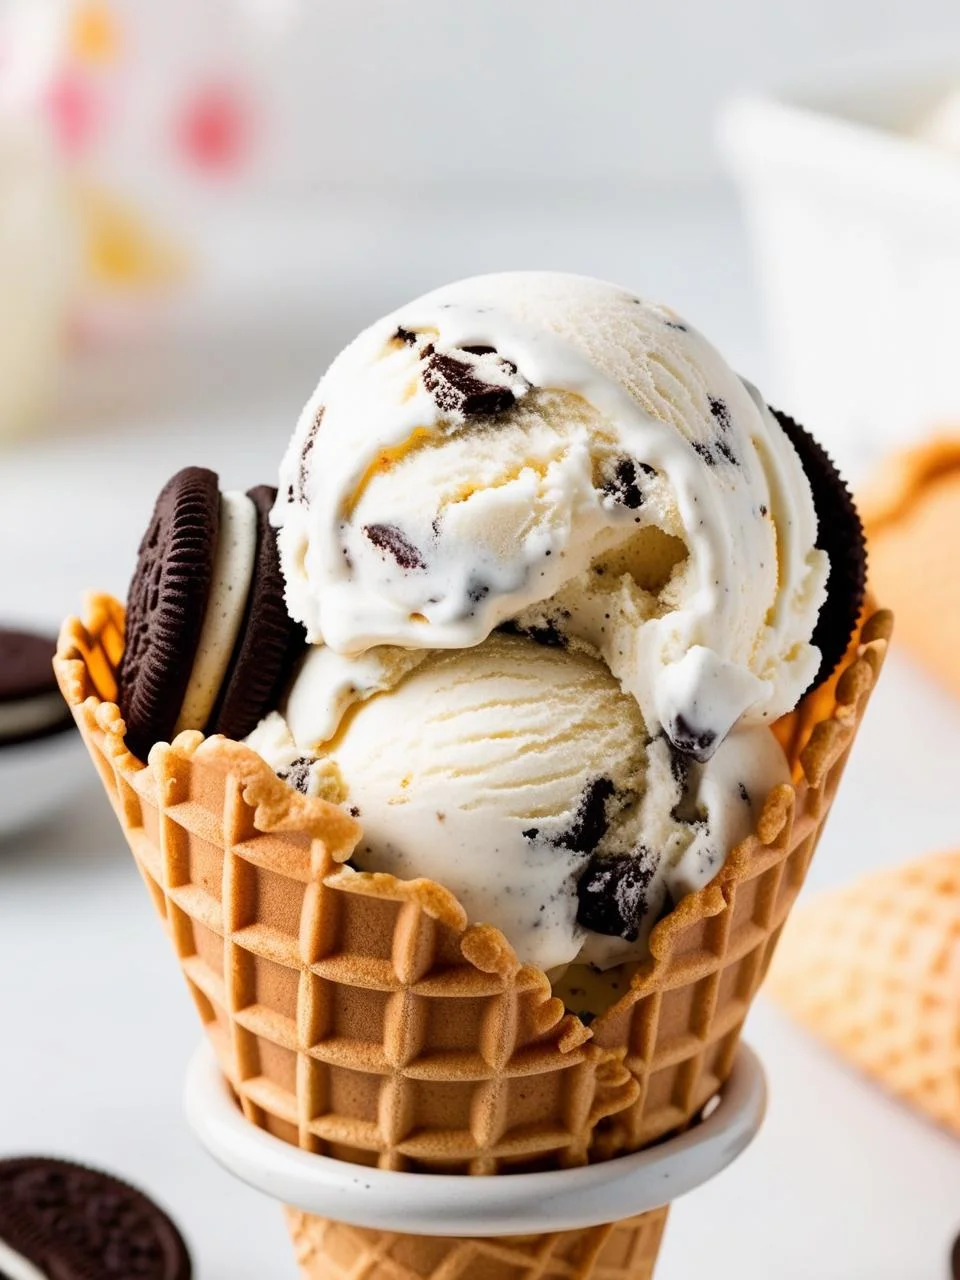
- Serve in waffle cones topped with extra cookie crumbles.
- Sandwich a scoop between two cookies for homemade ice cream sandwiches.
- Top with whipped cream and hot fudge for a decadent sundae.
- Serve alongside a warm brownie for the ultimate dessert pairing.
Personal Tip: Slightly soften the ice cream for 5 minutes before scooping — it makes serving so much easier and creamier!
Common Mistakes to Avoid
- Underwhipping the cream: Make sure you reach stiff peaks for a light, fluffy texture.
- Overmixing when folding: Fold gently to keep the whipped cream’s volume intact.
- Freezing in shallow containers: Use a deep container like a loaf pan to prevent freezer burn.
- Skimping on cookies: More cookies mean more fun in every bite — don’t hold back!
Following these tips ensures your no-churn ice cream turns out rich, creamy, and loaded with cookie goodness!
Storing Tips for the Recipe
- Freezing: Store covered tightly in a loaf pan or freezer-safe container.
- Best Freshness: Enjoy within 2 weeks for the creamiest texture.
- Avoid Ice Crystals: Press a layer of plastic wrap directly onto the surface before sealing to minimize ice crystal formation.
Prep Tip: Make extra batches with different mix-ins like crushed peanut butter cups or caramel swirls for endless variations!
Conclusion
No-churn Cookies and Cream Ice Cream proves that you don’t need an expensive machine or hours of work to enjoy luxurious, homemade ice cream. With simple ingredients and a few easy steps, you can create a frozen treat that’s rich, creamy, and full of cookie chunks. Try this recipe today, and don’t forget to Pin it for later — you’ll want to come back to it every time your ice cream cravings strike!
FAQs
Can I make this ice cream without sweetened condensed milk?
It’s not recommended — condensed milk is essential for the creamy, sweet base without churning.
How long does homemade no-churn ice cream last?
It’s best enjoyed within 2 weeks, although it stays safe to eat longer if stored properly.
Can I add other mix-ins besides cookies?
Absolutely! Crushed candies, swirls of caramel, or chopped nuts all make fun additions.
Why is my ice cream icy?
It might not have been whipped enough, or it was stored without an airtight seal. Always cover tightly.
Can I use a dairy-free cream alternative?
Yes! Coconut cream works great for a rich, non-dairy version.